The American DIY Guide: How to Remove Rust from Your Car’s Body at Home
Don't let rust ruin your car's look. With simple tools and patience, you can professionally remove corrosion and restore the paint at home.
Today, I want to share how you can remove rust from your car right at home. It’s not an easy task — professional body repair can be very expensive. But letting your car slowly rust away isn’t an option either. So, here’s a detailed guide on how to remove small rust spots and minor body damage on your own.
Tools You’ll Need
Prepare a set that includes:
-
A sanding tool and sandpaper
-
Rust converter
-
Solvent (degreaser)
-
Anti-corrosion primer
-
Paint that matches your car’s color, plus clear coat (in spray cans)
-
Optional: two-component automotive body filler (with hardener)
Step-by-Step Rust Removal
In this kind of work, patience is key — don’t rush and don’t skip any steps. Take the task seriously for the best results.
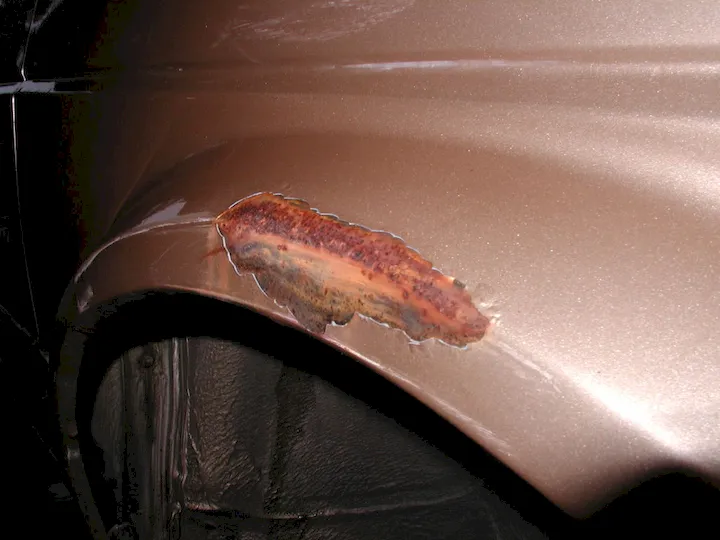
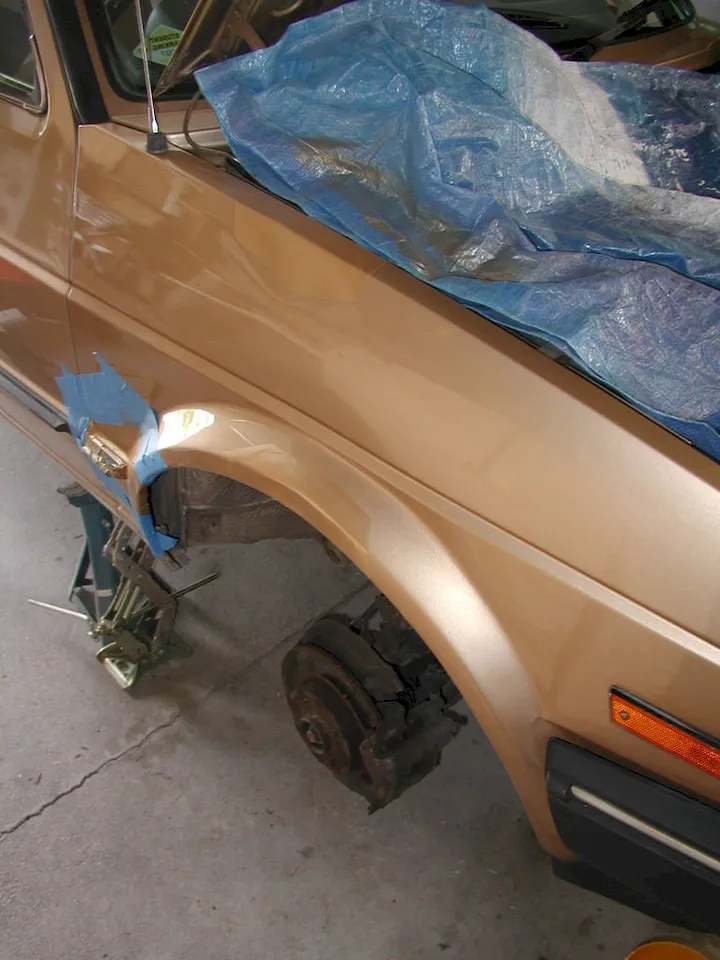
You can fight rust using a sandblaster or a grinder with a sanding disc, but you can also do it the simple way — by hand, using sandpaper.
Tip: Work carefully and slowly. Avoid deep scratches or harsh transitions. Your goal is a smooth, even surface.
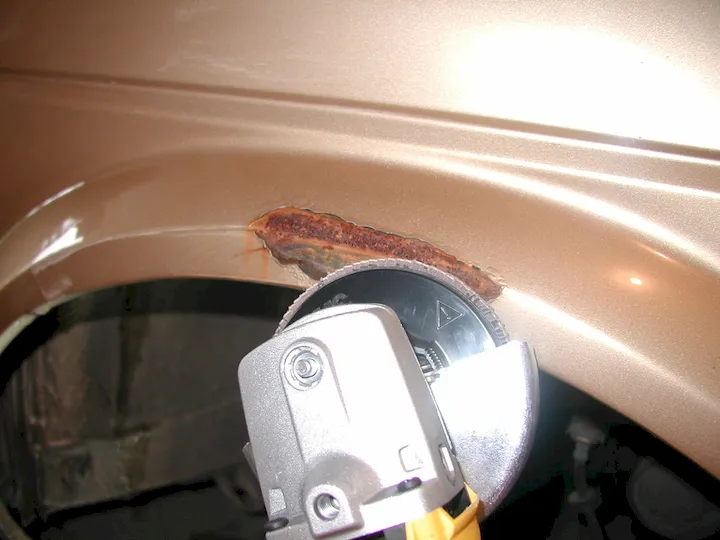
If you don’t have a power sander, hand sanding works fine.
Remove the damaged paint layer by layer, extending slightly beyond the rusted area.
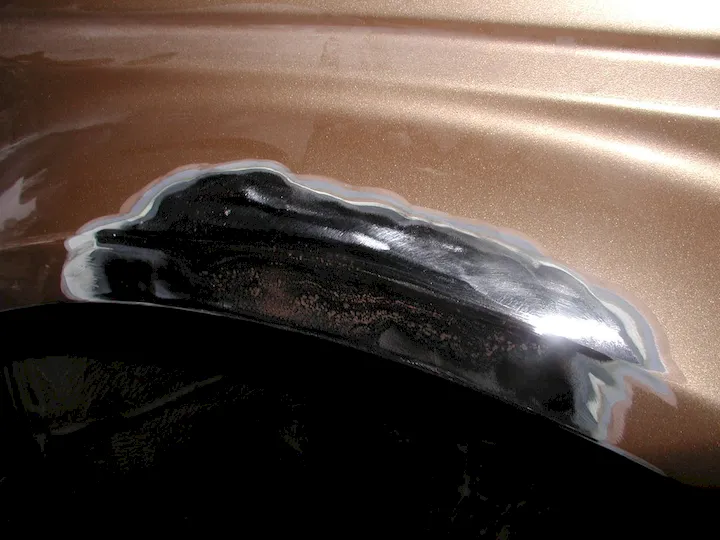
The quality of your sanding determines how long your repair will last.
Step 2: Apply Rust Converter
After sanding, treat the area with rust converter to remove any tiny, invisible traces of corrosion that could spread later. Let it sit for about 30 minutes, then wipe off the residue and degrease the metal with solvent.
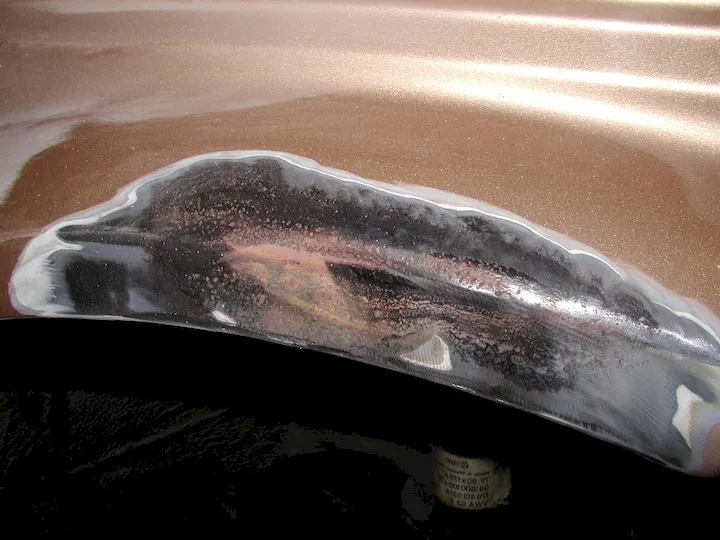
Step 3: Apply Body Filler (If Needed)
After painting, small scratches or dents may still be visible — that’s why filler is often necessary.
Apply several thin layers, sanding each one smooth before adding the next.
Your goal is a perfectly flat surface before moving on to priming and painting.
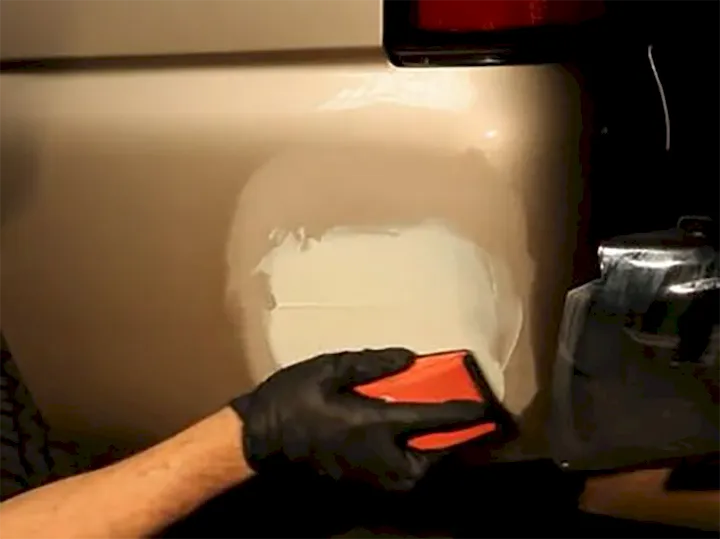
You’ll need several grits of sandpaper for this step.
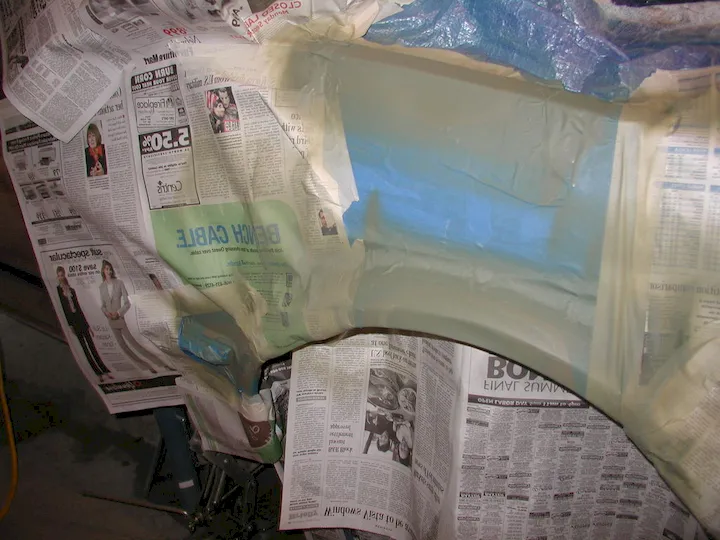
Step 4: Mask the Surrounding Area
Now for the fun part — restoring your car’s appearance.
To prevent overspray, mask off the surrounding area (about 3 feet around the repair spot) using plastic wrap, newspapers, and painter’s tape.
If you’re working outdoors, be mindful of the wind direction and keep dust away from your freshly sanded surface.

Step 5: Apply Primer
Start with an anti-corrosion primer. It comes in various colors, so choose one that suits your paint (avoid dark primers under light colors).
Spray from 8–12 inches away, moving smoothly side to side.
Apply 2–3 coats, letting each dry for at least 15–20 minutes in warm weather.
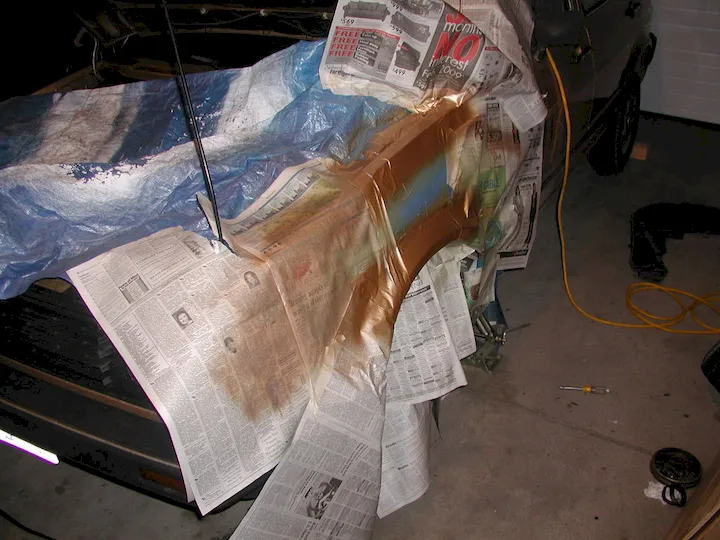
Step 6: Paint and Clear Coat
Next comes the color coat — apply 2–3 layers, allowing each to dry properly.
Give the final coat extra time to cure before applying clear coat in the same manner.
This will protect your repair and give it a glossy, professional finish.
Note: You don’t need advanced painting skills to get good results — just patience and attention to detail.
Step 7: Finishing Touches
The final result should make you proud! Much depends on choosing the right paint shade, so take your time selecting it.
To blend the new paint seamlessly with the old, use automotive polish applied with a soft cloth or polishing pad.
Don’t worry if the result isn’t perfect right away — you can always touch it up later. Anyone can remove rust if they’re motivated enough, but remember to stay realistic about your skills and tools.
(For those who can easily afford professional repairs — you can skip this tutorial!)
You may also be interested in the news:
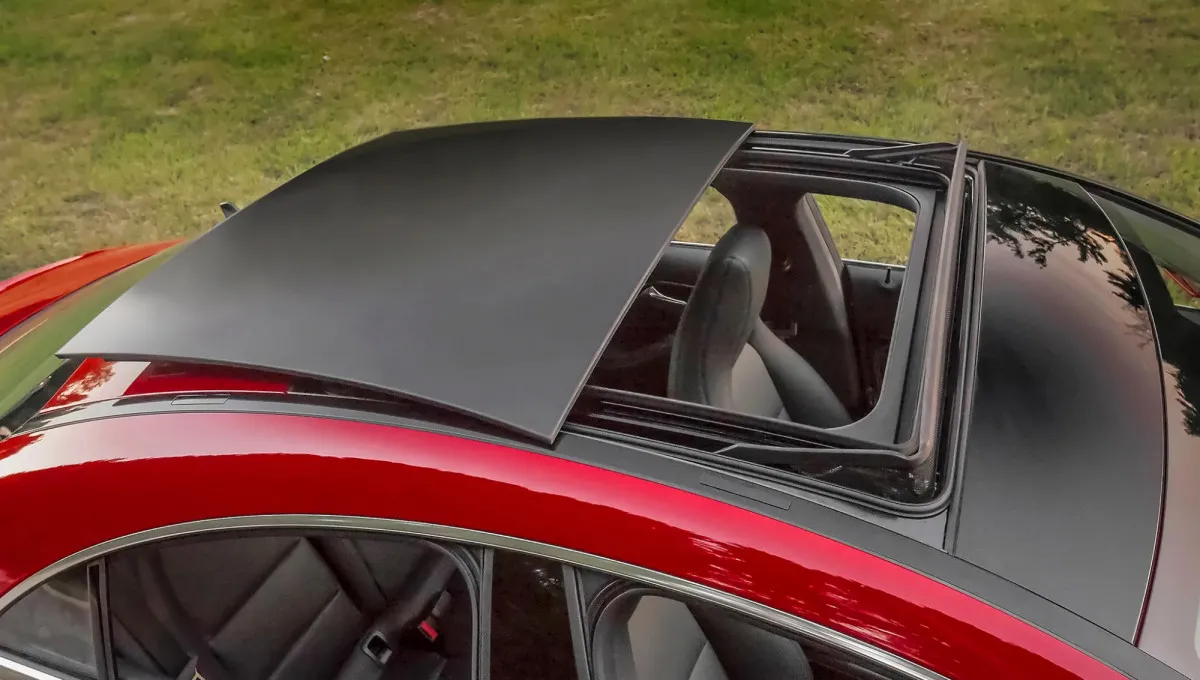
The Pros and Cons of Cars With Panoramic Roofs
A panoramic roof can make a vehicle look and feel more upscale, but it also comes with some important trade-offs.
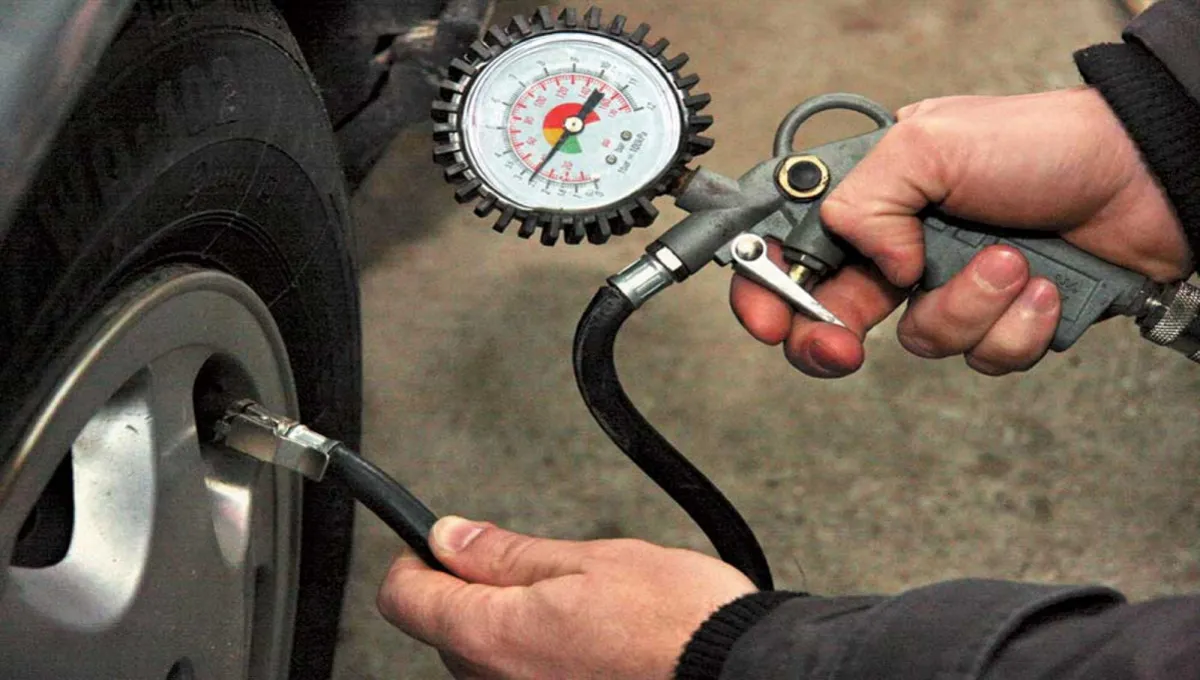
Summer Tire Pressure: How Incorrect Inflation Increases Wear and Fuel Consumption
Proper tire pressure in hot weather can reduce tire wear, improve grip, and help cut fuel consumption by up to 10%.
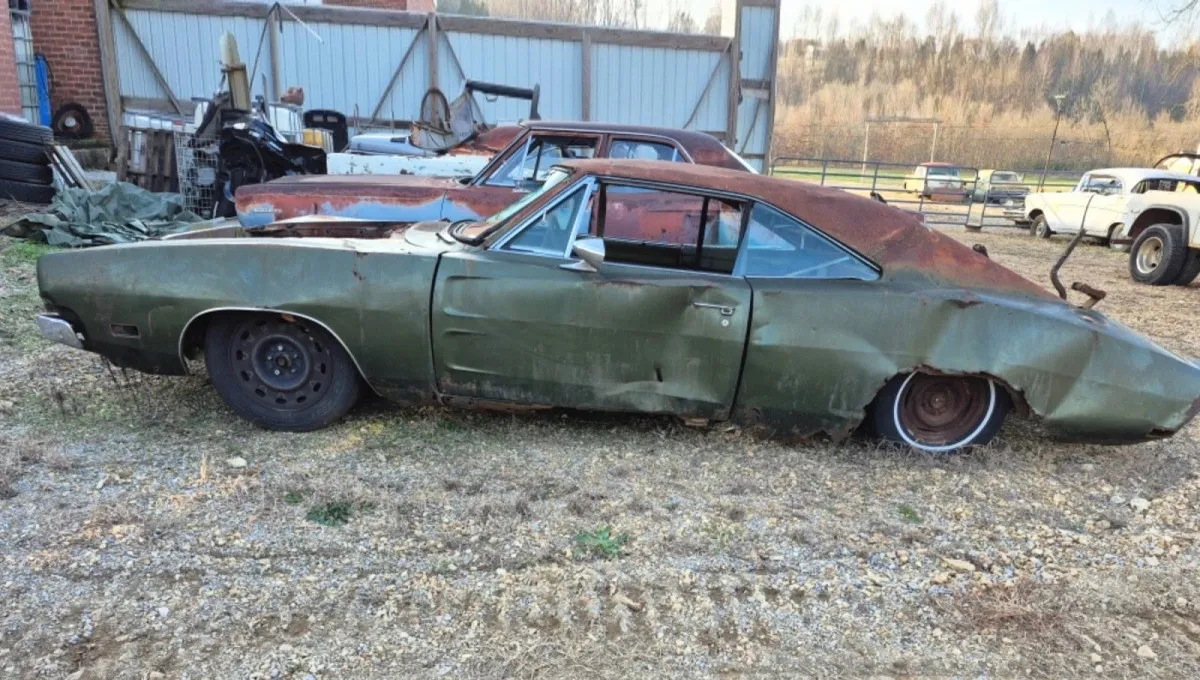
Can This 1969 Dodge Charger Still Be Saved, or Is It Finally Ready for the Scrap Yard?
A severely deteriorated 1969 Dodge Charger is testing whether any collector still believes it's worth rescuing today.
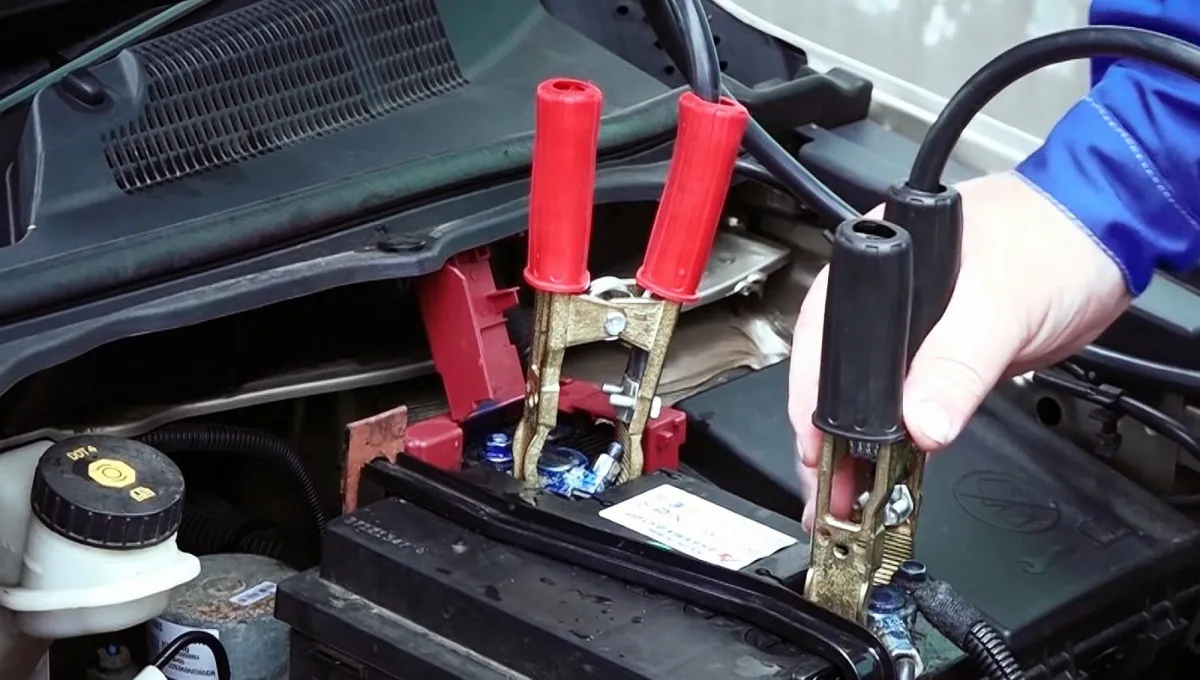
How to Properly Connect Jumper Cables to Jump-Start a Car
Reversing polarity or causing a voltage spike can instantly damage sensitive electronic control modules.